This article discusses the settings page for Kentik AI in the Kentik portal.
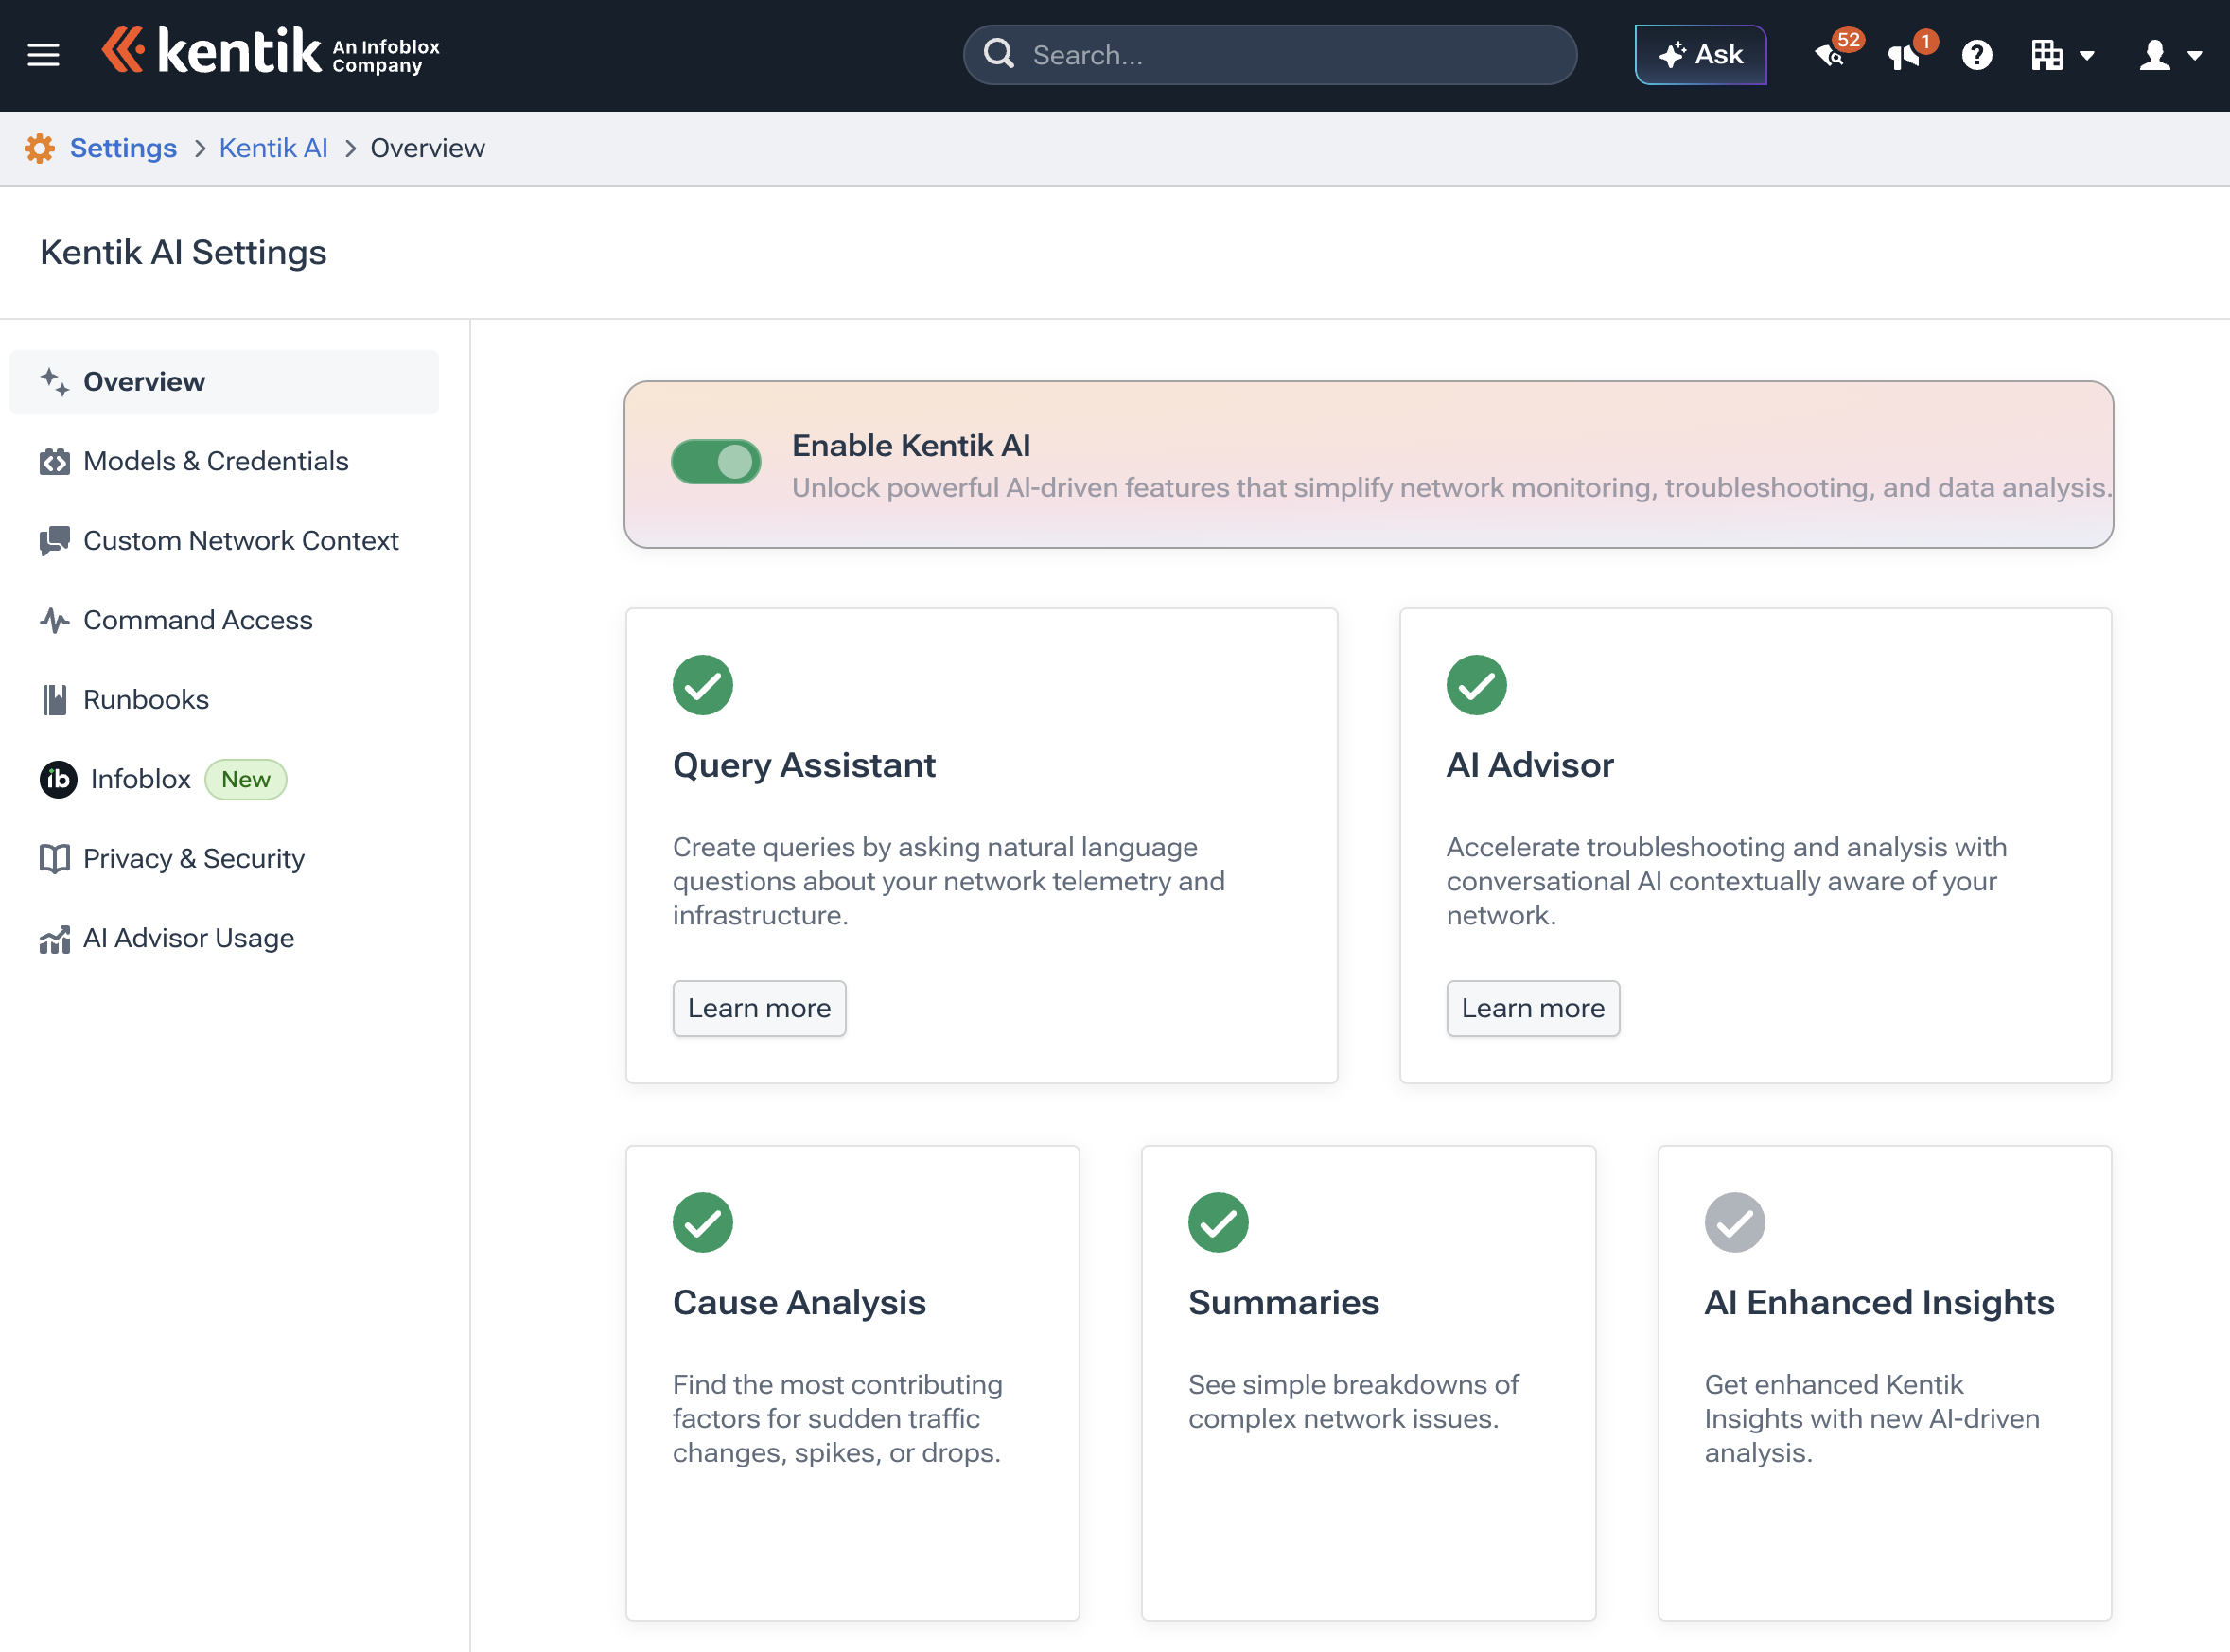
Overview pane of the Kentik AI settings page.
Note: Before enabling Kentik AI, see Kentik AI Overview for a full understanding of what it is, how it works, and to learn about the precautions we take to ensure our customers' data privacy and security.
About Kentik AI Settings

The Organization Settings dropdown displays the Kentik AI settings.
The Kentik AI settings page allows you to enable and configure Kentik AI features such as AI Advisor and others. Key points include:
Available to all users of the Kentik portal (see About Users), although most panes are reserved for Administrators and Super Administrators. Members can open only the Runbooks and Infoblox panes while the other panes appear dimmed.
Navigate to it by clicking the navbar's Organization Settings drop-down and selecting Kentik AI.
This page allows you to turn On or Off aspects of Kentik AI for the entire organization (see Customer Control of AI).
Manage Kentik AI
Follow these steps to manage Kentik AI settings in the Kentik portal.
Overview Pane
The Overview pane is the default pane of the Kentik AI settings page, and is where you to set Kentik AI to either disabled (default) or enabled for your entire organization:
Choose Kentik AI from the Organization Settings menu to open the Kentik AI settings page.
Note: The Kentik AI menu option is present for all users, but most panes are available only to Administrators and Super Administrators.
Set the Enable Kentik AI switch On to enable Kentik AI. Set the switch to Off to disable Kentik AI.
 When Kentik AI is enabled, the following additional settings panes display in the left sidebar. Follow the links for details:
Models & Credentials (not enabled for most customers)
Models & Credentials Pane
Important: The Models & Credentials pane is only visible or enabled by request, typically by customers that require a specific provider, region, or model to be used by Kentik AI. Contact Kentik support for assistance with this feature.
The Models & Credentials pane of the Kentik AI settings page contains the settings for the Advanced and Basic models used by Kentik AI.
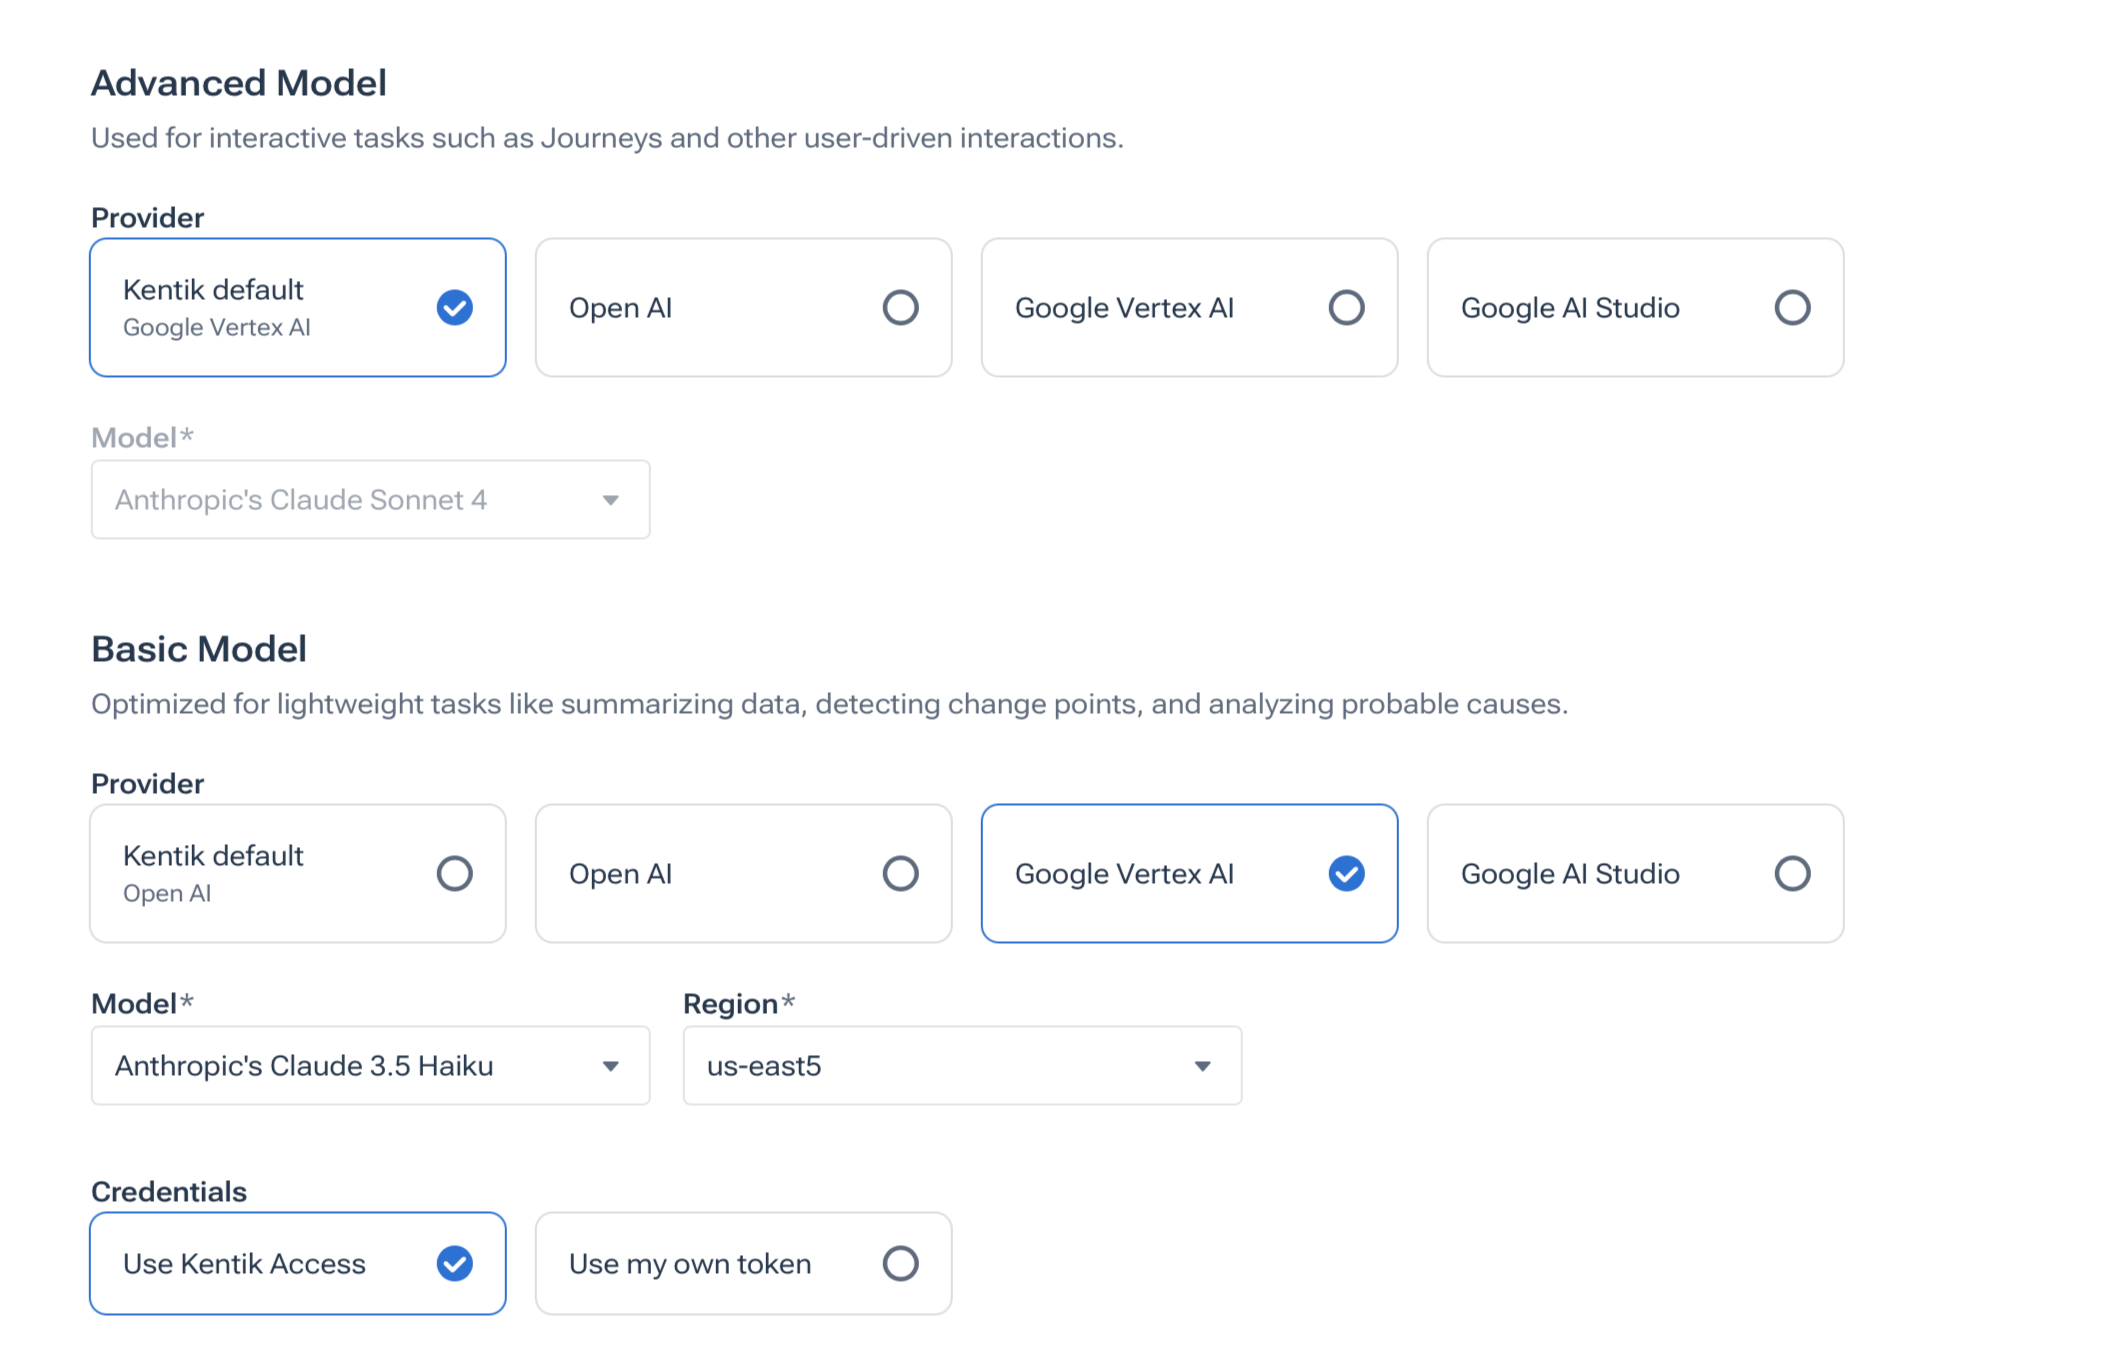
Advanced Model: Used for interactive tasks such as AI Advisor and other user-driven interactions.
Basic Model: Optimized for lightweight tasks such as summarizing data, detecting change points, and analyzing probable causes.
For each model, you can customize the provider and corresponding model, region, credentials, and API token as applicable. Click the Save button to save your changes.
Provider: Choose a Large Language Model (LLM) provider and model for Kentik AI.
Kentik default
Open AI
Google Vertex AI
Google AI Studio (Google Gemini models)
Notes:
If Kentik default is selected, the other settings will not display.
If additional support is required (Azure, AWS, Anthropic), open a feature request with Kentik.
To opt for “Bring-Your-Own-Key” mode, select Use my own token and follow the steps in Create AI API Token.
Model: The * symbol indicates this is a required field. Depending on the provider you choose, select one of the models in the drop-down selection.
Region: The * symbol indicates this is a required field. Depending on the model you choose, select one of the regions in the drop-down selection.
Credentials: Select Use Kentik Access or Use my own token. If you select Use my own token, then the API Token section will display.
API Token: When Use my own token credentials is selected, choose an API Token from the drop-down selection. You also have the option to Create an AI API Token (see Create AI API Token).
Create AI API Token
If you select Use my own token, you can select an existing API Token or create your own AI API Token. To create an API token, complete the following steps:

Ensure Use my own token is selected in the Credentials section.
Select Create AI API Token.
Complete the required fields in the Add Credential popup window.
Note: To edit existing credentials, click the Credentials Vault link. The Settings » Credentials Vault page opens.
Click Add Credential to save your changes for the API Token.

The Add Credential popup window for creating an AI API token
Custom Network Context Pane
The Custom Network Context pane allows you to add additional text-based information about your network environment. This helps Kentik AI deliver more accurate and relevant insights as your organization’s needs evolve.
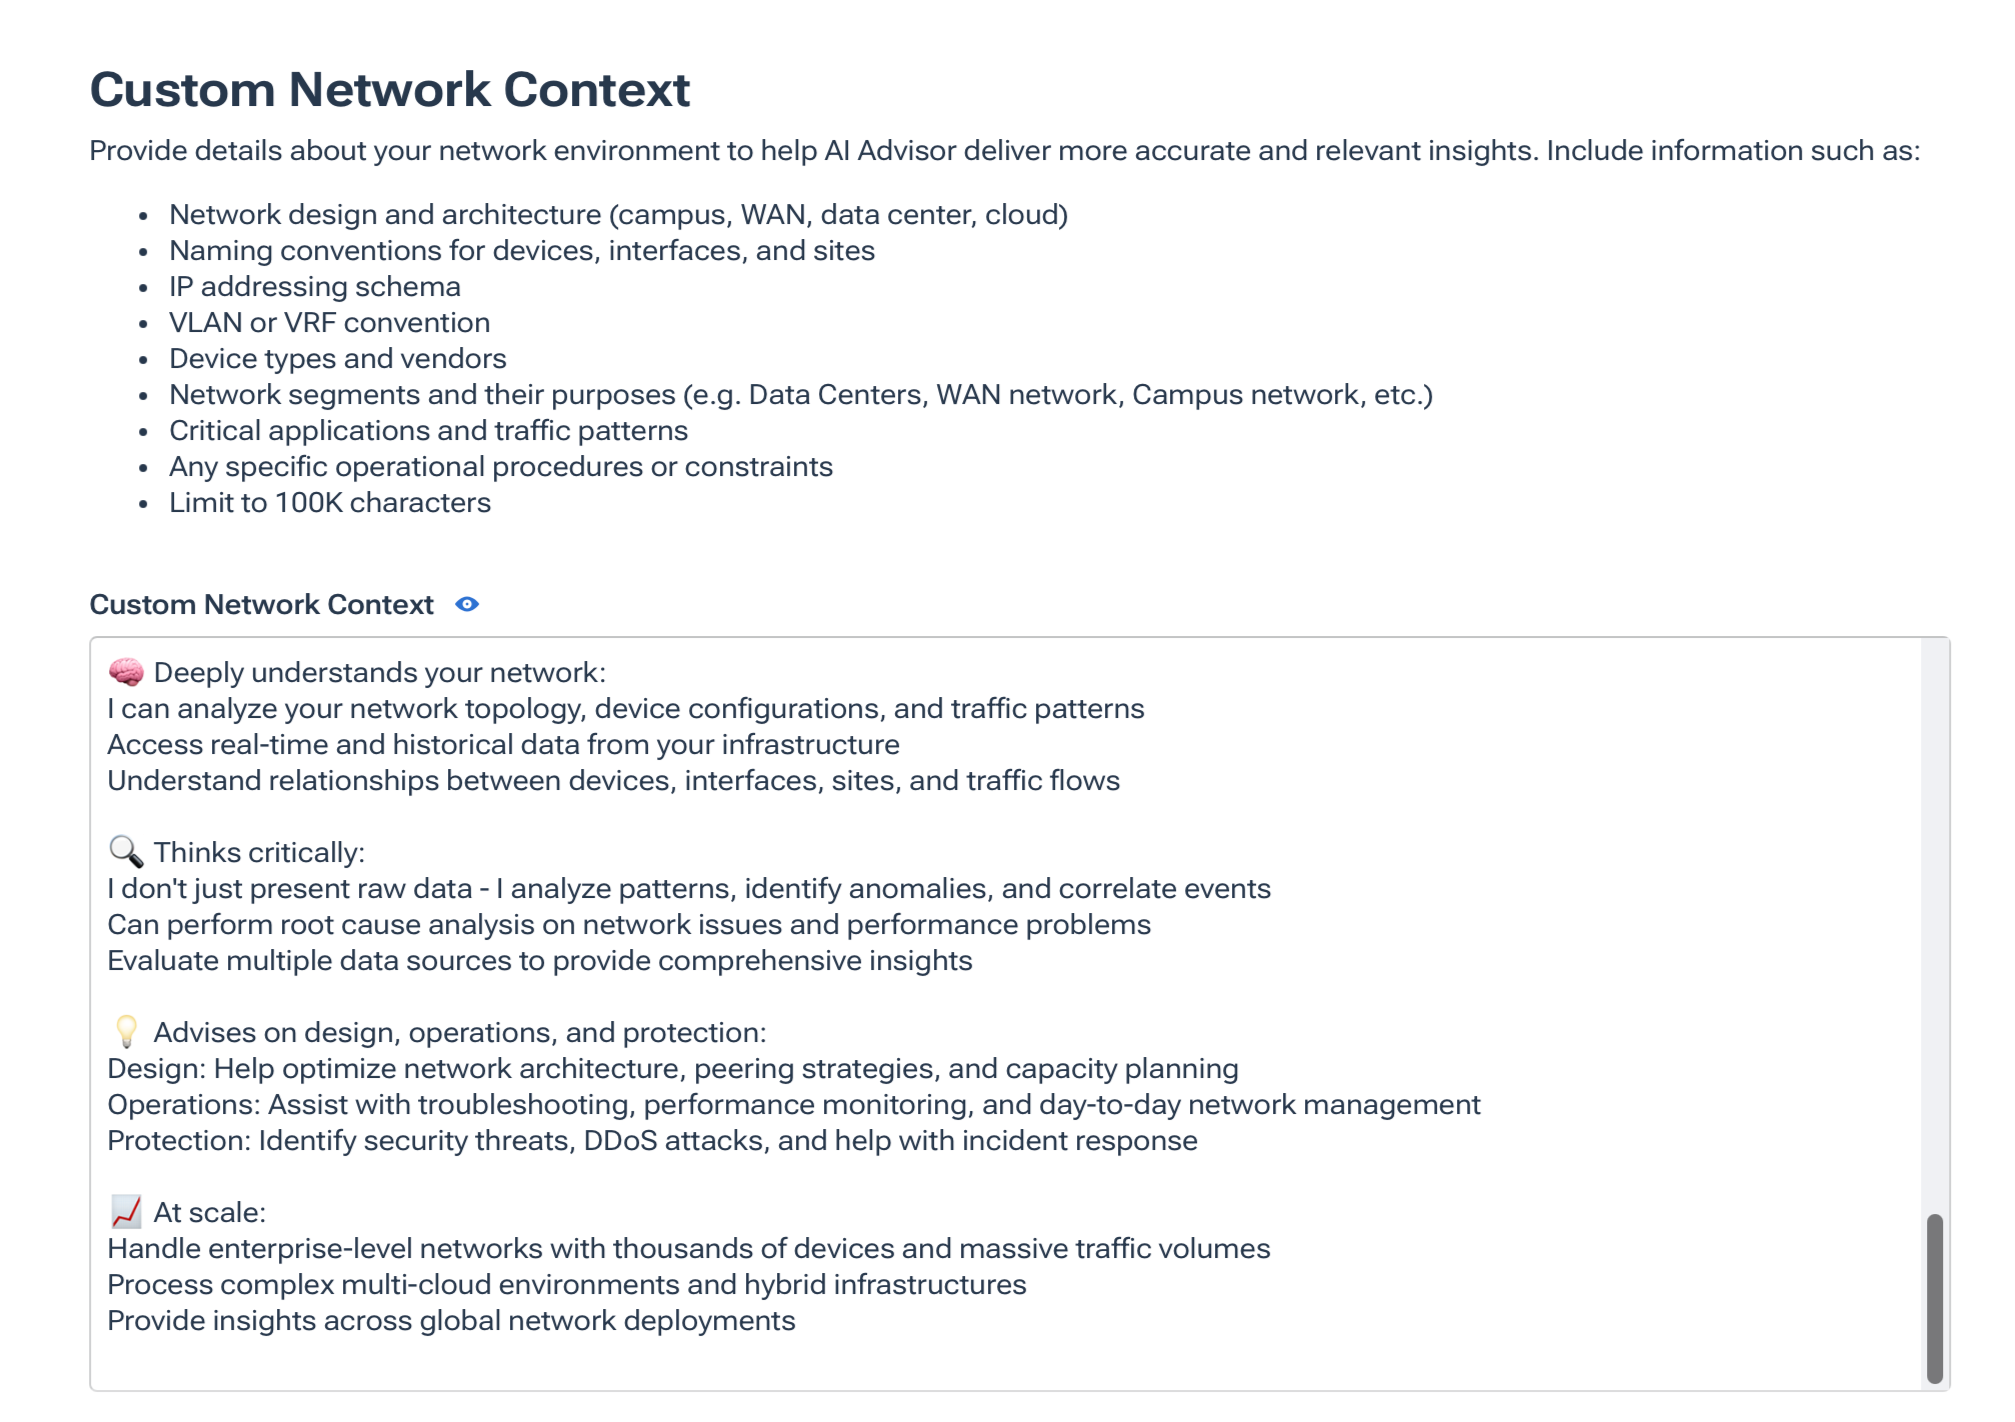
Here’s how it works:
Add up to 100K characters of Markdown-formatted text into the Custom Network Context input field.
Click the eye icon to preview the rendered Markdown.
The context you provide can be as specific (IP addressing schemes, network design info) or general (strategies for troubleshooting, or personas to take on), as necessary to accomplish your organization’s goals.
Kentik AI uses this additional context in all conversations in your organization.
Command Access Pane
The Command Access pane of the Kentik AI settings page is where you can enable AI Advisor to use Secure Shell (SSH) access to your network devices.
When you enable Command Access on a device, Kentik’s Software as a Service (SaaS) clusters gain access to that device. Command Access has stricter security controls than most other Kentik AI features. For this reason, its settings have a dedicated pane.
Command Access requires a Kentik Network Monitoring System (NMS) device license.
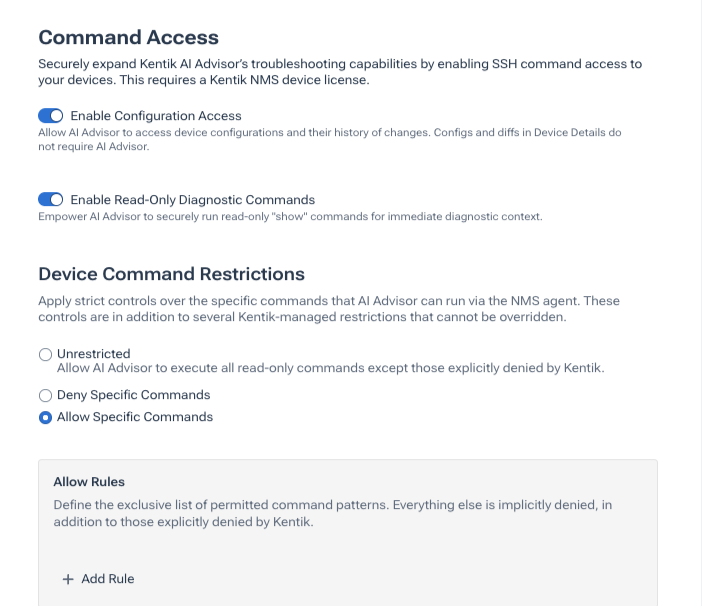
The Command Access pane displaying Allow Rules.
Command Access Pane Roles
Access to the Command Access pane depends on your user role (see About Users):
Members: Cannot access the pane. It appears dimmed in the sidebar.
Administrators: Can access the pane but cannot change its settings.
Super Administrators: Are the only users who can change the settings on the pane.
Command Access Permissions for AI Advisor
The Command Access pane has the following settings:
Enable Configuration Access: Allows AI Advisor to read device configurations and track changes over time. This includes configurations collected by the NMS Config Context option.
Enable Read-Only Diagnostic Commands: Allows AI Advisor to run read-only commands on network devices to display real-time diagnostics.
Note: Enable Configuration Access affects only AI Advisor. You can view configurations and diffs on the Configs tab in Device Details without it.
Important: For AI Advisor to run commands on a device, you must enable the Command Access setting in both of the following places:
Device-level: On the SSH tab in Device Settings, Enable SSH command access to devices and Enable Read-Only Diagnostic Commands are turned on. See Setup: Device Diagnostics Commands.
Organization-level: On the Command Access pane in Kentik AI settings, Enable Read-Only Diagnostic Commands is on.
You can find more information in Why Command Access May Fail.
Device Command Restrictions
Device Command Restrictions control which commands AI Advisor can run on your devices. This feature consists of two restriction categories, Kentik-managed restrictions and user-managed restrictions. Both categories apply together.
Kentik-managed restrictions are composed of a deny list of prohibited commands for each vendor that Kentik supports. To view the list of commands, click View Kentik-managed restrictions. The pop-up that opens displays each command pattern, tagged as an exact match or a regular expression (regex) match. Kentik-managed restrictions always apply, and you cannot change them.
Note: Kentik-managed restrictions always apply, and you cannot change them.
User-managed restrictions are managed through one of the following options:
Unrestricted: AI Advisor can run any read-only command that the Kentik-managed restrictions do not block.
Deny Specific Commands: Prevents AI Advisor from running the commands you list in the Deny Rules section. Everything else is allowed. This is the less restrictive option.
Allow Specific Commands: Limits AI Advisor to the commands you list in the Allow Rules section. All other commands are denied. This is the more restrictive option.
Allow Rules and Deny Rules
When you select Deny Specific Commands or Allow Specific Commands, the Deny Rules or Allow Rules section appears below the options. Each rule in the section contains the following:
Match type: A drop-down that sets how the rule matches commands. The values are Exact, Contains, and Regex.
Command: A field for the command or pattern. For example, an Exact rule uses show running-config, and a Regex rule uses ^shutdown.*.
Delete: A trash can icon that deletes the rule.
Add or Remove Command Rules
To add or remove a rule:
Choose Kentik AI from the Organization Settings menu, and then click Command Access in the left sidebar.
Under Device Command Restrictions, select Deny Specific Commands or Allow Specific Commands.
In the Deny Rules or Allow Rules section, do one of the following:
To add a rule, click Add Rule, select the match type from the drop-down, and enter the command or pattern in the command field.
To remove a rule, click the trash can icon at the end of the rule.
Repeat the previous step for each additional rule you want to add or remove.
Click Save to save your changes.
Runbooks Pane
The Runbooks pane of the Kentik AI settings page contains settings for creating Runbooks, or predefined, plain text or Markdown recipes to guide AI Advisor through the diagnostic steps for specific alerts. Runbooks can:
Be assigned to one or more alert policies
Start the investigation from any alert with all the relevant information already in place
Help to minimize human and/or AI errors by ensuring a pre-defined, systematic troubleshooting approach for specific situations
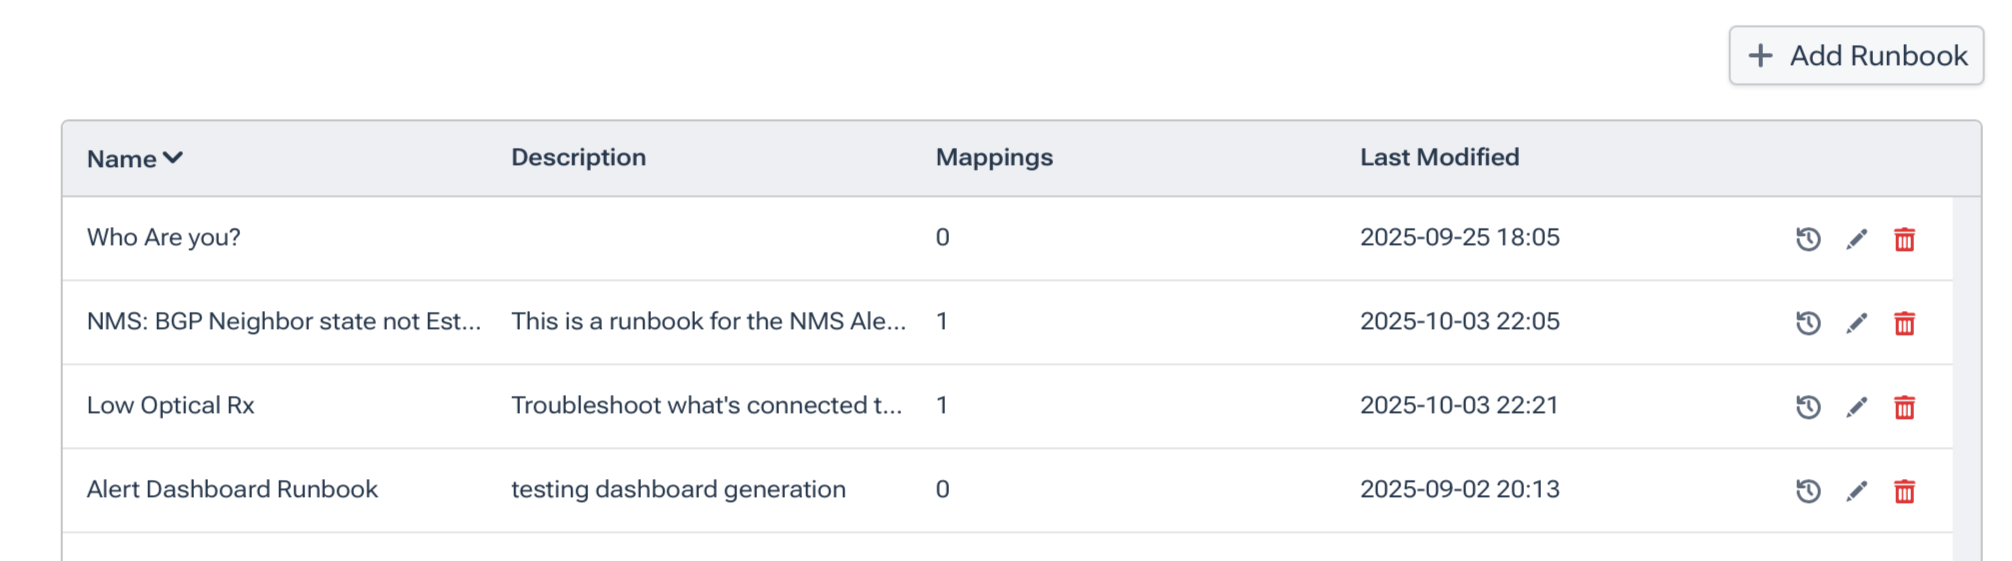
The Kentik AI settings page showing a list of Runbooks.
Add a Runbook
To add a new Runbook and assign it to an existing Kentik alert policy, follow these steps:
Click the Runbooks pane on the Kentik AI settings page.
Click + Add Runbook to open the dialog.
Name (required): Enter a unique name for the Runbook.
Description: Optionally, add a Runbook description.
Instructions: Add your Markdown-formatted text with detailed instructions and context for Kentik AI to use in a particular situation.
Navigate to the Alert Policy Assignments tab to see the list of alert policies in your organization.
Optionally, check the box for each alert policy to which you want to assign this Runbook.
Click Add Runbook to create the new Runbook and return to Kentik AI settings page.
Revert a Runbook to a Prior Version
To view the list of saved versions of a Runbook and revert to a previous version, follow these steps:
Click the Runbooks pane on the Kentik AI settings page.
Click the Runbook Revision History button (the ‘rewind the clock’ icon) next to the Runbook in the list.
Click a revision in the right pane to view it. The left pane shows the contents of the current revision, and the right pane lists the revisions. When you view a past revision, additions appear in green and removals appear in red.
Click Revert to adopt the previous Runbook version and return to the Kentik AI settings page, or click the X to exit without saving.
Edit/Delete a Runbook
To edit or delete a Runbook, follow these steps.
Click the Runbooks pane on the Kentik AI settings page.
To edit a Runbook:
Click the Edit button (pencil icon) next to the Runbook in the list.
Make the changes (see Add a Runbook), then click Save to save changes and exit.
To delete a Runbook:
Click the Delete button (trash can icon) next to the Runbook in the list.
Click Remove to confirm deletion or Cancel to exit without saving.
Infoblox Pane
The Infoblox pane of the Kentik AI settings page is where you can enable AI Advisor to connect to your Infoblox account and include your Infoblox data in its reasoning. When AI Advisor determines that a question requires Infoblox data, it queries Infoblox on your behalf and shows in the conversation that it did so.
All users can open the Infoblox pane and connect their own Infoblox account. Only Administrators and Super Administrators can turn the Infoblox toggle on or off or change the Infoblox realm.
Notes:
This integration benefits only customers who use both Kentik and Infoblox. It does not create an account in either portal. Users need an existing account in both.
AI Advisor uses Infoblox data to answer questions. AI Advisor does not make changes to your Infoblox configuration.
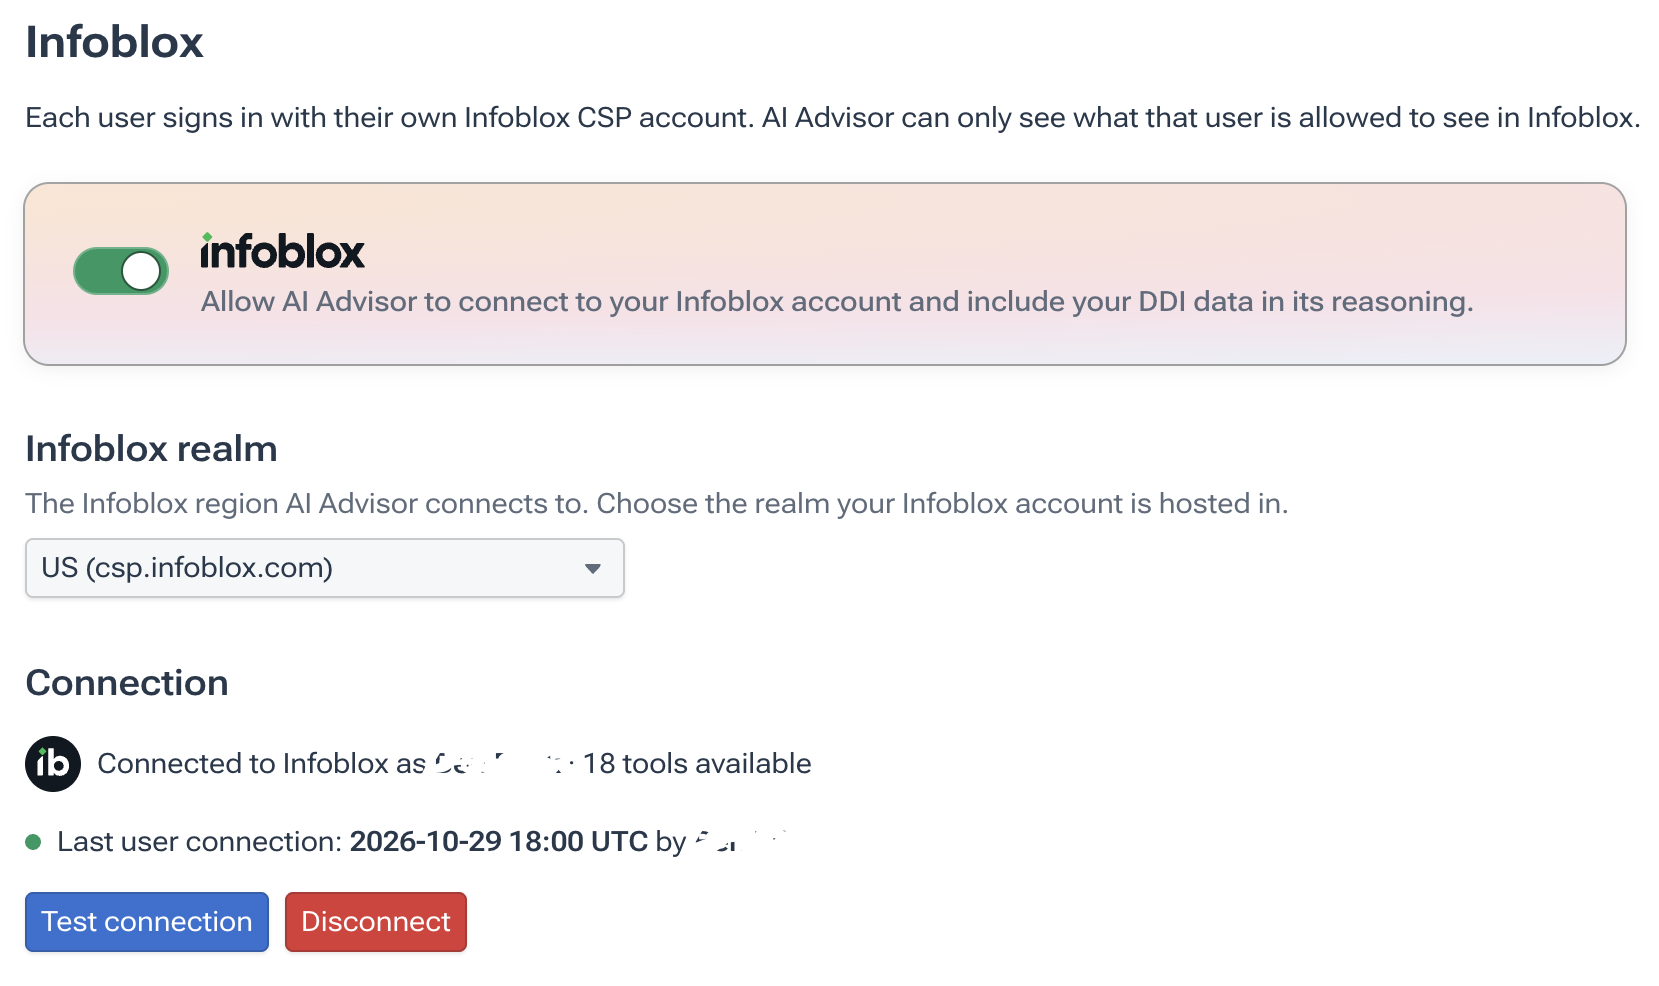
The Infoblox pane of the Kentik AI settings page when connected.
The pane has the following settings:
Infoblox toggle: Allows AI Advisor to connect to your Infoblox account for your entire organization. Turning it off cancels all active user tokens and disconnects every user. After you turn it back on, every user must authenticate again. Available to Administrators and Super Administrators only.
Infoblox realm: The Infoblox region that AI Advisor connects to. Select the realm that hosts your Infoblox account. Available to Administrators and Super Administrators only.
Connection: Indicates whether you are connected to Infoblox and the account you are connected as, along with the number of tools that Infoblox exposes through the connection. It also shows when, and by which user, the last connection in your organization was made. The count includes tools that AI Advisor does not use. AI Advisor uses only the tools that look up information.
Connect to Infoblox: Opens the Infoblox login page in a new tab, so you can authenticate with your own Infoblox account. Available to all users.
Test connection: Appears instead of Connect to Infoblox when you are connected. Tests the connection to Infoblox. A message confirms that the connection is working and shows the number of tools that Infoblox exposes through the connection.
Disconnect: Ends your connection to Infoblox.
Connect to Infoblox
To connect your account to Infoblox from the Kentik AI settings page, follow these steps:
Choose Kentik AI from the Organization Settings menu.
Click Infoblox in the left sidebar.
Confirm that the Infoblox toggle is On and that Infoblox realm matches your Infoblox account.
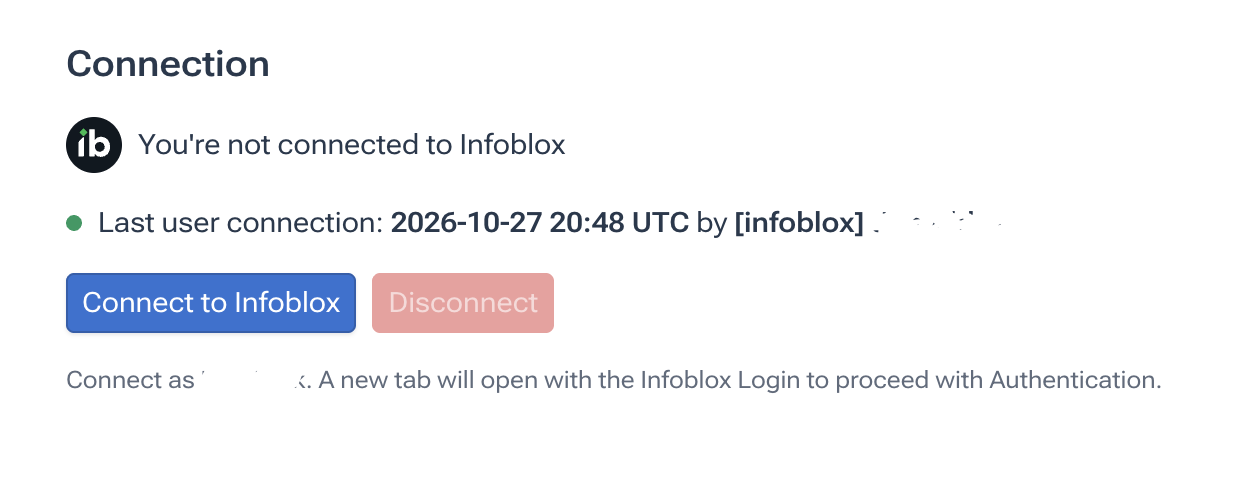
Connection section showing that no Infoblox account is connected.
Click Connect to Infoblox. A new tab opens to the Infoblox login page.
Log in. On the Infoblox consent page, select the account to use, then click Accept.
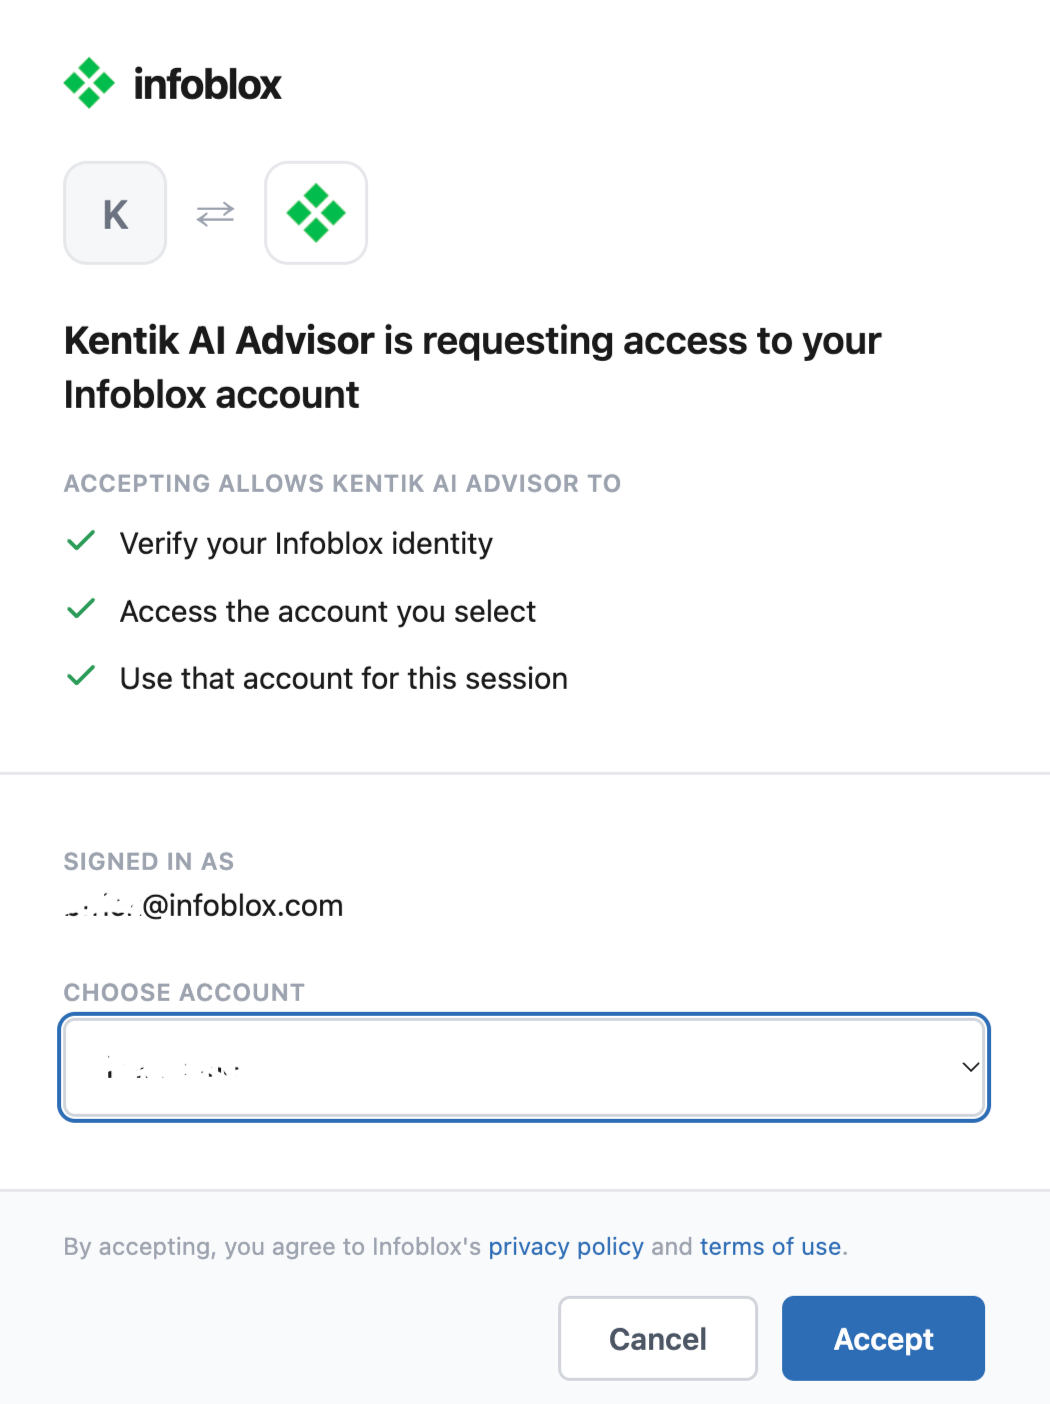
The Infoblox consent page for selecting an account.
Return to the Infoblox pane. Connection shows that you are connected to Infoblox as your user.
Notes:
Authentication to Infoblox is per user, and AI Advisor can see only the data your Infoblox user account is allowed to see.
If your authentication expires, AI Advisor prompts you to re-authenticate during a conversation (see Authenticate with Infoblox in a Conversation).
If the connection attempt to Infoblox fails, check that your Infoblox account credentials are still valid.
If the connection attempt to Infoblox succeeds, but you’re getting errors in AI Advisor conversations when trying to access Infoblox data, ask your Infoblox portal administrator to check your account's permissions.
Privacy and Security
The Privacy & Security pane of the Kentik AI Settings page is informational only, and links to the Kentik AI Overview article in the Kentik Knowledge Base. Please read this article before enabling Kentik AI.

AI Advisor Usage Pane
The AI Advisor Usage pane of the Kentik AI settings page shows how your organization has used AI Advisor over the last 12 months. The pane is available to Administrators and Super Administrators only.
The pane has the following information:
Questions: Summary statistics for the number of questions asked (average, maximum, most recent, and total), with a bar chart of questions over time.
Questions Per User: A table of the users who have asked the most questions (up to 50), with the number of questions each user has asked.